I need to start this post off by thanking my dad for giving me the ability to look at a problem and not get scared by it. I grew up thinking/knowing that he could make or fix just about anything. I never saw him work on a dryer, but attempting to fix it with very little knowledge of how to fix it seems like something he would have done. So doing things like this doesn't scare me.
One day last week our dryer stopped working. The problem we had was that after the dryer was going through a whole cycle, but wasn't drying the clothes. The first thing I thought was that the dryer vent was clogged, but after getting this pile out of the hose it still didn't work.

Then I went down to Leonardi's. They have been fantastic with past issues I have had and even took me down to the basement when we had a washer issue last year and showed me what was wrong and how to fix it. They went as far as having me take one of their old ones apart and fixing the part that was broken on my washer. They did this just to make sure that I would know what I was doing when I went home. They are great there. My problem was the same as I did a few years ago. Actually, when I went in there I suggested it was the same problem that I had awhile ago and the guy looked it up and it turns out that on August 21, 2007 I did this same fix on the same dryer. He said the parts generally last for about 5 years. How about that!
FYI, nothing too exciting about this one.
Here's the before picture with one of my beautiful models.
Maddie needed me to take a picture of her as well.
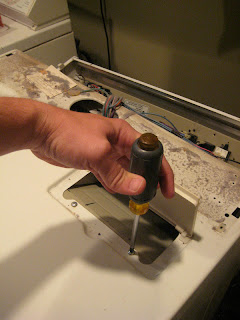
The first thing I had to do was take the top off. I took two screws off the control panel and removed it only later to realize that wasn't necessary. Then I took these two screws off by the lint trap. They hold the top on.
After removing the screws, I just shoved my screwdriver into this crack and snapped the top up and off.
Like this!
Next I unplugged the switch that tells the motor that the door is closed.
Then I found out that no one was watching Charlie and he was playing dress-up. Man that boy needs a better male role model in his life!
Last time I did this I was as far as I needed to be as far as taking the dryer apart. That wasn't the case this time because I couldn't get my screwdriver on the screws to remove the old coils at this point so I had to take the drum out. That part really stunk!
That black thing is one of the coils.
Here are the replacements:
Here is the dryer without the drum. There were no pictures of the removal because that part needed 3 or 4 more hands than I already had. It was not as easy as I had hoped.
Removing the cover off the old broken coils.
Replacing the coils.
Looking at the drum and hoping that it will just put itself back on with the belt wrapped tightly around it.
Success! This is a picture of the flames going inside the dryer. The coils are doing their job!
What a good sight!
Complete.
I did 4 loads tonight after fixing the dryer. We really needed that thing fixed!
As promised, nothing exciting in this post, just a description of a job that I wouldn't have the ability or ambition to attempt without my Dad doing projects similar to this while I was growing up. Thanks Dad!


